Log in to your Typepad account. You'll see your welcome screen and the name of your blog. Click on either the name of your blog.

From the tabs at the top, click on the Design tab.

Then choose the Change Theme option.

You want to set your theme to "Custom Theme" (rather than "Pre-Defined") on the next page.
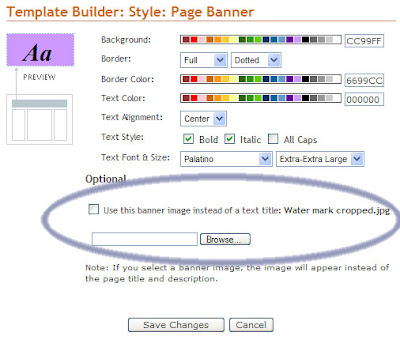
The second option down is Page Banner. Click the "Edit this Element" button. This opens a new window with Style Options.
Click the box next to the text that reads "use this banner image instead of a text title. Use the browse button to navigate to your banner image as you have saved it on your computer.

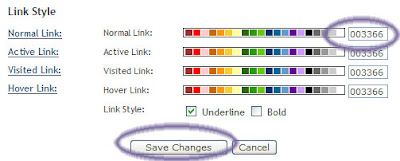
Click the "Save Changes" button. This will take you back to the "Customize Your Theme" page with all your options for editing your template.

On the "General Page Settings" page you can choose different colors for your page elements
- General Settings:
- Background color
- Border location and style
- Border color
- Left Column width
- Background color
- Border location and style
- Border color
- Main Content Column width
- Background color
- Border location and style
- Border color
- Right Column width
- Background color
- Border location and style
- Border color
- Link colors

Any time you click the "Save Changes" button it will close the color pallette box and you can choose to then preview your blog's new look by clicking the "Preview" button at the bottom of the "Customize Your Theme" page. Once you like the new color scheme, click the "Save Changes" button at the bottom of the "Customize Your Theme" page and your new theme/colors will be published and go live.


1 comment:
Awesome information. I prefer a custom made banner any day of the week, and not only in banners but in other stuff as well. Because that way you can do whatever you want and however you want it to be done which is the best part of it.
Post a Comment